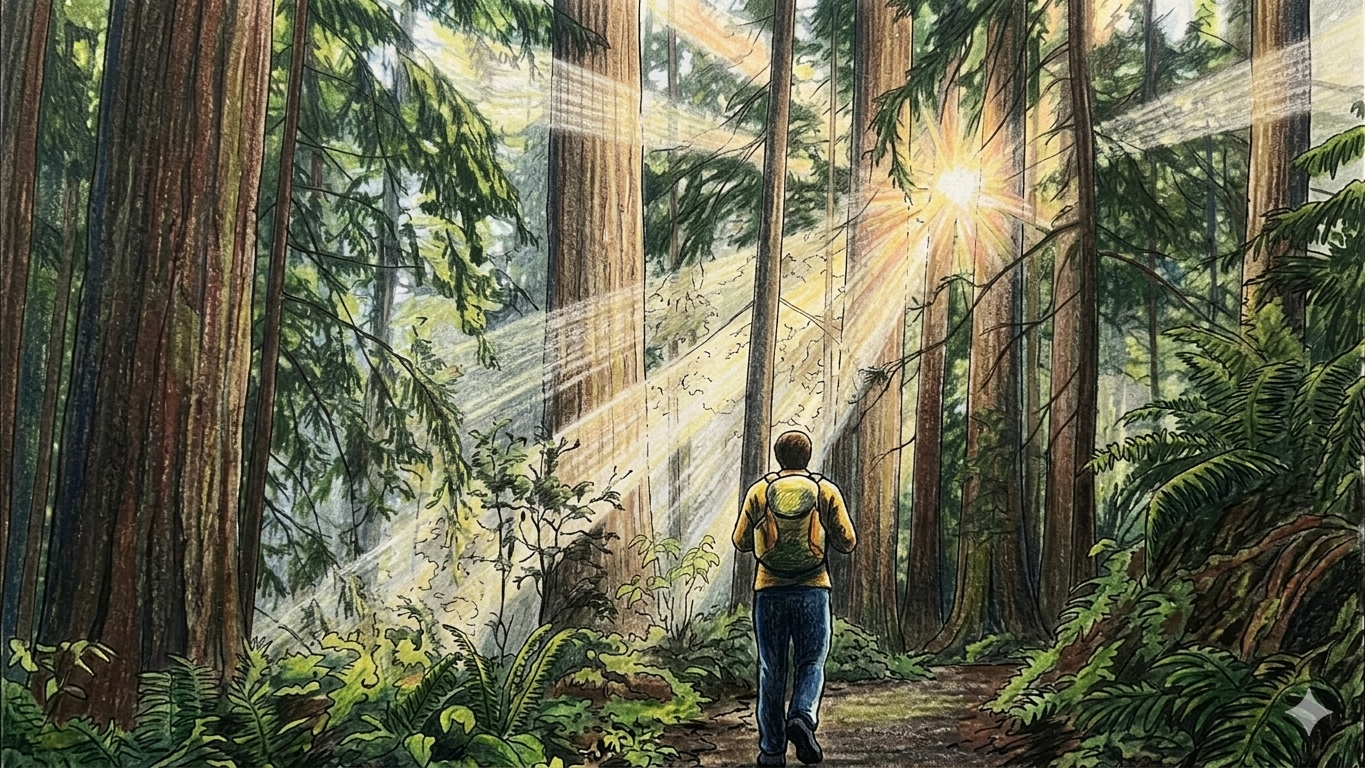
Adding highlights and shadows with crayons or colored pencils is about defining where a light source is coming from and using layers of varying pressure and color to create depth. Note how the following techniques were used to create highlights and shadows in the above coloring book page.
Determine Your Light Source
Before you start coloring, decide where the light is coming from.
-
- The Dot Trick: Place a tiny pencil dot in one corner of your page to represent the “sun” or a “lamp.”
- Highlight Placement: Highlights go on the parts of the object closest to your dot (the light source).
- Shadow Placement: Shadows fall on the opposite side of the object, furthest from the light.
Creating Shadows
Shadows make your art look 3D by adding weight to the “hidden” parts of an object.
-
- Color Selection: Use a darker shade of your base color (e.g., dark blue over light blue) or a complementary color (e.g., a tiny bit of green over red) to deepen shadows.
- Layering and Pressure: Start by applying your base color with medium pressure. Then, go back to the shadow side with the same crayon or a darker one and apply heavier pressure to build intensity.
- Soft Edges: To avoid harsh lines, blend your shadow into the mid-tone by using light, circular strokes.
Creating Highlights (Brightness)
Highlights represent where light directly hits a surface, making it look shiny or curved.
-
- Preserve White Space: The easiest way to highlight with crayons is to leave a small area of the white paper completely uncolored.
- White Crayon “Burnishing”: For a softer highlight, color your object normally, then firmly rub a white crayon over the area where the light hits. This blends the wax and lightens the pigment underneath.
- Mixed Media Pop: For sharp, brilliant highlights (like the reflection in an eye), many artists use a white gel pen or white acrylic marker on top of the finished wax.
Special Effects
You can cast shadows by adding a thin, dark line on the ground directly beneath your object to make it look like it’s sitting on a surface rather than floating in the air.
Stippling for texture helps you create dimension by adding many small dots of a darker color in the shadow areas. The closer the dots, the deeper the shadow appears.